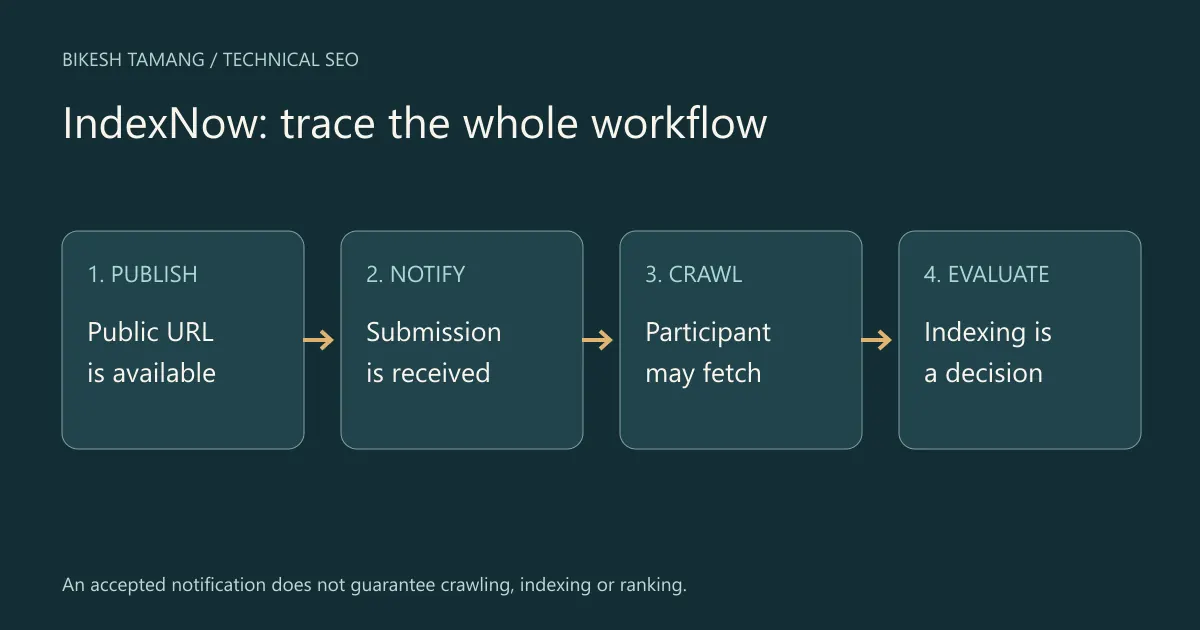
IndexNow lets a website notify participating services when a URL is added, changed or deleted. A successful notification confirms a submission step. It does not promise that the page will be crawled immediately, indexed or ranked.
This guide explains how to check an existing integration, publish the verification file, send a request and investigate failures. The request examples use a fictional domain and demonstration key. They are not submissions from this website or evidence of faster indexing.
If your main problem is a page missing from Google, start with discovered versus crawled, currently not indexed. IndexNow is an additional discovery mechanism for its participants, rather than a replacement for that diagnosis.
Key takeaways
- Check whether your CMS or SEO plugin already submits updates.
- Make the correct key file publicly accessible before sending URLs.
- Investigate the response body and host/key relationship when requests fail.
- Measure notifications, crawling, indexing and traffic as separate stages.
Table of contents
- What does IndexNow do, and does Google use it?
- Step 1: Check whether your CMS already supports IndexNow
- Step 2: Publish and verify the key file
- Step 3: Build a request using the public URLs
- Step 4: Interpret 200, 202, 403 and 422 correctly
- How do you debug an IndexNow 403 error?
- How do you debug an IndexNow 422 error?
- Step 5: Connect notifications to publishing and deletion
- Step 6: Monitor the outcomes that matter
- Frequently asked questions
- Your next step
What does IndexNow do, and does Google use it?
IndexNow is a notification protocol. Your website supplies a changed URL and a key that demonstrates control over the host. Participating services can use that notification in their discovery process. They still decide how to crawl and index the resource.
The official IndexNow participant registry, checked on 12 October 2026, includes Bing and several other participants. Google is absent from that registry. Do not describe an IndexNow success response as a Google indexing confirmation, or expect it to repair an unrelated Google Search Console exclusion.
There are useful distinctions between these events:
| Stage | What it tells you | What it does not establish |
|---|---|---|
| A CMS records a URL change | Your publishing system identified an event | That an external service received it |
| The endpoint accepts a request | The submission passed the endpoint's checks | That the page was fetched or indexed |
| Server logs show a verified crawler fetch | A crawler requested that resource | That the URL became eligible for search results |
| Webmaster tools show indexing | The tool reports the URL in its index | That it will rank for a particular query |
| Search performance improves | Search visibility or clicks changed | That the notification alone caused the change |
Treat these as checkpoints when reporting results. The Bing Webmaster Guidelines remain relevant to crawlability, content and indexing quality after a notification has been accepted.
Step 1: Check whether your CMS already supports IndexNow
Inspect your CMS settings, SEO plugin settings and hosting integrations before adding custom code. Ask who owns the submission process and where its logs are stored. An existing integration may already handle publishing, edits and deletion events.
The IndexNow FAQ lists integration options and explains the notification approach. For WordPress, the IndexNow plugin maintained by the Bing Webmaster team provides an implementation option. Check compatibility, current maintenance and the tools already active on your site before choosing it.
Use a short inventory:
- Which system detects a published URL change?
- Does it send the public canonical URL or an editor preview URL?
- Does it record the endpoint response and time?
- What happens if the request fails?
- Does another plugin send the same event?
- Can you inspect a single URL's submission history?
Avoid installing several overlapping submitters simply because each advertises quicker indexing. Duplicate integrations make failures harder to attribute and add unnecessary notifications. Choose a clear owner and preserve its logs.
For a small static site, a deployment step may be sufficient. For a store with frequent inventory changes, a durable queue is usually more practical. Either implementation should submit real changes to public URLs, rather than every URL on every scheduled run.
Step 2: Publish and verify the key file
Generate a key according to the protocol requirements. The examples below use a hexadecimal demonstration value. Replace it with your own key before adapting the request. The key is publicly verifiable by design; it should not be confused with a CMS administrator password or a private analytics credential.
The simplest arrangement places a plain text file at the host's root:
https://example.com/0123456789abcdef0123456789abcdef.txtIts text content is the key itself:
0123456789abcdef0123456789abcdefThe official IndexNow documentation describes key hosting, optional keyLocation, request formats and URL scope. A file hosted in a subdirectory has scope implications. Root hosting is easier to reason about when the integration covers the entire host.
Check the deployed file from outside your logged-in CMS session. It should deliver the expected plain text, rather than a sign-in page, branded error document or JavaScript challenge. Check the final URL as well as the apparent browser display. A custom error page can look convincing while returning an unrelated status or HTML response.
For a Next.js application, a file in the public directory can be served from the corresponding root path. The Next.js public folder reference explains this mapping. Confirm the production build contains the file and that middleware does not intercept it. A file existing in a local checkout is not evidence that the deployed host serves it.
If you have separate www and non-www hosts, choose the canonical public host and verify the key there. Keep the request's host, submitted URLs and key location consistent. Do not casually mix production, staging and preview domains.
Step 3: Build a request using the public URLs
For a single URL, the protocol supports a GET request containing the changed URL and key. For an automated workflow, a POST request with a JSON body is often easier to log, batch and retry.
Here is a complete illustrative payload:
{
  "host": "example.com",
  "key": "0123456789abcdef0123456789abcdef",
  "keyLocation": "https://example.com/0123456789abcdef0123456789abcdef.txt",
  "urlList": [
    "https://example.com/blog/updated-guide/",
    "https://example.com/products/blue-backpack/"
  ]
}
The host value is the hostname, without the scheme or page path. Each member of urlList is an absolute public URL. The example includes keyLocation to make the relationship visible; consult the protocol documentation when deciding whether your root-file implementation needs that optional field.
Download the editable request template. All values in that file are demonstrations. Review and replace them before use.
An illustrative command is:
curl -i "https://api.indexnow.org/indexnow" \
  -H "Content-Type: application/json; charset=utf-8" \
  --data-binary @indexnow-request-template.json
This example has not been sent on your behalf. Run it only after substituting the host and key and confirming that the listed URLs represent real changes.
The protocol allows up to 10,000 URLs in a POST request, according to its documentation. That is a maximum, not a target batch size. Smaller batches can make errors easier to trace when you are establishing the workflow. Keep the actual submitted list, response status and response body together.
Step 4: Interpret 200, 202, 403 and 422 correctly
Read the response from the endpoint you actually contacted. The protocol documentation supplies common status meanings, while a participating service may return additional detail. Yandex's IndexNow request reference is one useful participant-specific reference for errors and validation.
| Response | Initial interpretation | First investigation |
|---|---|---|
| 200 | Submission succeeded | Record the batch; check crawling and indexing separately |
| 202 | Request received; key validation is pending | Check key accessibility and follow the service's validation process |
| 400 | The request format is invalid | Inspect JSON, field names, content type and URL encoding |
| 403 | Key validation or authorization failed | Compare the submitted key with the publicly served file |
| 422 | Submitted URLs or key relationship failed validation | Check host consistency, URL scope, key format and endpoint response detail |
| 429 | A rate or spam protection limit was reached | Respect retry guidance and reduce unnecessary submissions |
Do not turn this table into a rule that every 403 has the same origin. A CDN, proxy or application can return its own 403 before the IndexNow endpoint or a verification fetch completes. Capture response headers and the body to distinguish the source.
Likewise, do not retry an invalid payload endlessly. A corrected host or key file addresses a validation error; repeating the same broken request does not. Separate retryable transport failures from configuration failures that need a person to inspect them.
How do you debug an IndexNow 403 error?
Start with the exact key file URL in the request. Check its status, content type and body. Then compare the file's text with the submitted key. Inspect the deployed response rather than the file you intended to upload.
Common causes worth checking include:
- The file never reached the production deployment.
- Middleware sends unauthenticated requests to a login route.
- A CDN cache serves an earlier missing-file response.
- The root route returns an HTML fallback instead of the text file.
- A security rule challenges the verification request.
- The request supplies a key belonging to a different host.
If security logs show a block, identify the rule, request path and actual requester before changing the rule. Use the smallest applicable adjustment and verify the result. Broadly disabling your firewall is not a useful default debugging step.
The same investigation discipline applies to Cloudflare and Googlebot 403 errors, but the requester and endpoint are different here. Do not copy a Googlebot exception and assume it will fix IndexNow key validation.
After correcting the cause, verify the public file again and retry a small, relevant batch. Save the original failure and successful follow-up as implementation evidence. Do not describe them as an indexing case study unless you also have indexing evidence.
How do you debug an IndexNow 422 error?
Compare each URL against the request's declared host. Look for www mismatches, staging URLs, malformed absolute URLs and URLs outside a custom key location's permitted scope. Read any endpoint-specific message before changing unrelated site settings.
A useful debugging worksheet contains:
| Check | Example of the problem | Correction to investigate |
|---|---|---|
| Host | example.com declared, www.example.com submitted | Use the verified intended host consistently |
| Environment | A preview deployment URL enters the batch | Filter to public production URLs |
| Key scope | Subfolder key used for unrelated paths | Revisit key location and permitted URL scope |
| Data format | A full URL is used as host | Supply the hostname in the expected field |
| Key value | A truncated value reaches the job | Inspect configuration loading and payload creation |
Fixing a 422 does not require rewriting your page's title or content. It is a submission validation investigation. Once the endpoint accepts the request, evaluate page eligibility through the normal indexing workflow.
Step 5: Connect notifications to publishing and deletion
Send a notification after the public change becomes available. If the job runs before deployment, a participant could discover the old response. Coordinate the deployment success event, cache refresh and notification job so that submitted URLs represent the state visitors can access.
For additions, submit the new public URL. For meaningful edits, submit the changed URL. For deletions, notify the removed URL after its intended response is available. The FAQ covers added, updated and deleted content; removal handling still depends on what the URL serves and the receiving service's processing.
Do not automatically redirect every deleted page to the homepage. Choose the appropriate removal or replacement behavior based on the resource and user intent. Similarly, do not submit every tracking parameter variation when your public canonical resource is unchanged. The canonical tag guide explains the broader URL consolidation decisions.
An implementation queue should record the URL, change type, deployment identifier, last attempt, response and retry count. Deduplicate repeated events for the same final URL while preserving the latest public state. Keep failed jobs visible instead of silently deleting them.
Use a simple release test: publish one controlled change, confirm the public response, observe the notification record and inspect later crawl evidence. This gives the team a traceable chain without pretending that an accepted API request proves a ranking result.
Step 6: Monitor the outcomes that matter
Also check your public XML sitemap and its validation: IndexNow notifications and sitemap delivery are separate discovery steps, and neither confirms indexing.
Keep a submission log for implementation health. Use webmaster tools and verified crawler logs for discovery and indexing evidence. Use search performance reporting for impressions and clicks. These sources answer different questions and may update on different schedules.
Review a small sample of changed URLs after deployment. Can the page be fetched? Does it return the intended status? Is its canonical appropriate? Is it linked from the site? Are its content and sitemap current? If the sitemap is stale, use the sitemap publishing and cache debugging guide.
Continue maintaining robots.txt and internal links. A notification does not override a blocked resource or supply the context that good navigation and meaningful links provide.
When reporting a change, write what the evidence proves: “The deployment notified these updated URLs, and the endpoint accepted the batch.” Add crawl and indexing observations only when you have them. This keeps the report useful even when search visibility has not yet changed.
Frequently asked questions
Does IndexNow guarantee indexing or higher rankings?
No. It provides notifications to participants. Acceptance, fetching, indexing and ranking are separate outcomes. Investigate page accessibility, content quality, canonicalization and internal discovery if a submitted page remains absent.
Should I submit every URL every day?
Build the integration around actual additions, changes and deletions. Repeatedly notifying unchanged URLs adds noise and can complicate troubleshooting. Check what your CMS already sends before creating a second submission process.
Can I use IndexNow with Next.js?
Yes, you can implement the protocol in a publishing or deployment workflow. Verify the public key file and production host first. The protocol is not tied to a particular JavaScript framework, and a successful local build does not prove that the public verification file is accessible.
Is an IndexNow key a private API credential?
The protocol uses a publicly hosted key file to verify control. Keep unrelated CMS passwords and private service tokens out of it. Follow the protocol's key requirements and ensure the submitted key matches the deployed file.
Your next step
Inspect your existing integration, verify the key and trace one changed URL through the workflow before automating larger batches. Use the technical SEO guide for the surrounding crawlability checks. If the problem spans publishing, security rules and index eligibility, a technical SEO review can map the evidence and identify the failed stage.